Monday, December 26, 2011

Merry Christmas


I hope everyone has a Merry Christmas and are able to spend some time with friends, family, and loved ones this holiday season.  That and hopefully, you are able to hit an frozen lake or two!

Sunday, December 18, 2011

New Product Spotlight: Cold Snap Rod Clamp

As fishermen, it seems like most of us can never be content with just one of something.  I will be the first to admit that I have a crankbait, tungsten ice jig, and soft plastic addiction.  I need to have back ups for my back ups because heaven forbid if I were to lose one; I would be lost!  A similar lesson I learned from this experience is to never critique my wife for buying purses or shoes.  For if she was ever to see my collection of crankbaits, tungsten ice jigs, and soft plastics; I would be eating a lot of crow!

So what does any of that have to do with Cold Snap rod clamps?  Simply put, when you go ice fishing, do you just bring along one rod?  I'm certain that for the vast majority of anglers, the answer to that question is "no".  Many anglers will take anywhere from three to a dozen ice combos out on the ice with them.  A lot of fisherman like to utilize a second rod with a minnow and bobber while they jig with another rod.  Here in Iowa, we are limited to using only two rods on the ice, minus the backwaters of the Mississippi and Missouri River where fisherman are allowed three. In other states more lines are allowed.

So, how does one go about securing the other fishing rod(s)?  With the price of rods and reels increasing each year, one cannot afford to have numerous fishing combos go through the ice and to their watery grave.  There are many rod holder options available. I've certainly used many in my fishing endeavors, but I was never truly satisfied until I started using the Cold Snap rod clamp last winter.  What is nice about this rod clamp is that it attaches directly to the poles of your shack, is adjustable and removable, and is sturdy.  It keeps the rod up and off the ice where it could get accidentally stepped on or kicked in the hole.  For the anglers who do not fish a minnow/bobber setup, you can clamp extra rods right next to you allowing for quick presentation changes.

So, the next time you are thinking about what might be a good option for a rod holder, you may want to consider the Cold Snap Rod Clamps.  They are relatively inexpensive, work great, and have a small footprint in your shack.  The only caveat, is these clamps attach to 7/8" poles like in my Fish Trap Yukon and Fish Trap Pro ice houses.  Shelters with smaller poles, like the instant set up Fish Trap Scout TC or Fish Trap Trapper, do not have large enough diameter poles to support these clamps.

Monday, December 12, 2011

Weekend Report 12-9-11 to 12-11-11

It's always nice to get out for that first time on the ice.  Unfortunately, there isn't much ice around Des Moines so heading north was the best solution.  Below are some of the specifics and observations from this weekend; hopefully it will help some fisherman put some fish on the ice.

Ice Conditions 
(These numbers are from Friday through Sunday and are measured with a scoop which has a ruler; not eyeballed or guessed numbers)
Spirit Lake: 5-8" mix of snowy ice in some locations and crystal clear ice in others 
West Okoboji:  4-6" mix of snowy ice in some locations and crystal clear ice in others.  Middle of the lake is wide open.
Upper Gar: 4-5" snowy ice

Water Clarity
Spirit Lake: Depending on location, anywhere from 5-7 FOW
West Okoboji: Aquarium clear
Upper Gar: 3-4 FOW

Suggestions
-Try to work away from the crowds.  We all know Anglers Bay is an early ice destination, there were at least 30-40 shacks there on Friday afternoon and by the time we left early Saturday morning.  Most reports were poor from Anglers; pressured fish are notorious lookers.
-Typical early ice locations (rock piles, standing/green weeds, etc) are great places to start looking.
-When fishing gin clear water, stealth is the key especially when there is no snow on top of the ice.
-Having options while fishing is key; keep mixing it up until you find what the fish want.
-Be safe out there!

A few photos from the weekend; enjoy!
(First fish of the year; 13" black crappie)
(Still plenty of adult perch left in Spirit Lake)
(Dinner time!)
(Full moon fishing)

Monday, December 5, 2011

Go Time!

We dodged a bullet here in central Iowa with the area mostly receiving rain and not the large amounts of snow once predicted.  Over the weekend, we ended up with about an inch and a half of rain around Des Moines, which should add some much needed water to the local lakes, ponds, and rivers.  With our forecasts looking very favorable for ice formation, it appears like we might be able to fish some of our smaller bodies of water this weekend around central Iowa.  For those heading out, be sure to exercise caution and try to keep dry!  I know I made use of this weekend by getting the rest of my gear organized, putting fresh line on my reels, and making sure everything is ready for the weekend.

(First fish from last season; small little guy isn't he!)
One tradition I started many years ago was to take a picture of the first fish I caught each ice season.  It's fun to look back at the different fish and it helps rekindle fond memories of ice seasons gone by. In the past, I didn't take the time to photograph fish or scenery while I was out fishing, however, over the past few years I have made the time and am very thankful for doing so.  The next time you are out fishing, make the time to take some photos of your catches, the beauty surrounding you, and/or you and the people fishing with you while on the ice.  You will be glad you did so, trust me!

Finally, with the season kicking off this weekend I won't have as much time to write entries as I have these past two months.  My plan is to continue writing something up for Mondays which will include product reviews, fishing reports, and lessons learned that weekend.  I have a bunch of fantastic ice gear, much of which is new to the market this year, which I will continue to highlight once each month.  So stay tuned, the good stuff is just beginning!

Monday, November 28, 2011

Cyber Monday

Sorry boys, short write up today due to celebrating Thanksgiving, watching my Nebraska Huskers on Friday, and deer hunting the weekend.

Be sure to check out some of your retailers for "Cyber Monday" deals; there are some pretty good one's to be had.  Many stores offering free shipping too!  I will include a list of outdoor related stores (with links) offering Cyber Monday sales and if there are any i missed, please "comment" below.


Mills Fleet Farm
Cabelas
Bass Pro Shops
Scheels
Sportsmen's Warehouse

We're almost to ice fishing here in Iowa!

Monday, November 21, 2011

Safety First!

In my humble opinion, first ice offers ice fishermen some of the best fishing of all season.  Oxygen levels are high, weeds are still green, and there is an abundance of food; what more could a fish ask for?!  Many anglers talk about that late ice bite and while I do not disagree that it can be phenomenal for some species, it is pretty tough to beat early ice for panfish.  The first three weeks of the season can be down right "lights-out" since the fish haven't been bothered for a few weeks on most lakes.

With the conditions being ideal for catching fish on early ice, many anglers trek out onto the ice in late November and early December all throughout the ice belt in the United States.  Sadly, though, there are instances where people fall through thin ice and pass away due to drowning or hypothermia during this early ice period.  I'm as big of an ice fishing fanatic as there is, but let's be serious, no fish is worth dying for.  So, what steps can anglers take to limit the possibility of falling through the ice?  I've laid out seven suggestions below and I hope everyone takes a chance to read and put them into practice.

1. Fish with a buddy.  If one person falls in, there is a much greater chance of getting out with assistance.
2. Fish shallow water.  Ice forms closest to shore first and is much thicker there than it is in the middle of the lake.  Try some of your shallow water spots first as they will probably still be holding fish if there are weeds present.
3. Wear your ice picks.  They are inexpensive, they aren't heavy, and they can save your life.  Wear them around your neck and not packed away.
4. Take along a rope.  Pack a rope in your shack which can be used to either help pull your shack or to help pull someone out of the water.
5. Walking protocol: Stagger yourselves when walking on the ice as it distributes the weight more evenly.
6. Use a spud bar. This is probably the most important piece of early ice equipment.  Always check the ice with the spud before you take a step while you're walking.
7. Buoyancy: Some suits like the Arctic Armor and Mustang survival suit are buoyant which is nice.  Otherwise either fish in a life jacket or bring along a floating seat cushion.

I've linked a great webpage to look over about hypothermia and cold water survival; you can find it HERE.  Take a look at it and be sure to follow some of the suggestions if you are to fall into icy water.  Speaking from experience, one of the worst things you can do when falling into cold water is panic.  Have your wits about it and figure a way out as quickly as you can.

Finally, I have included a graphic below which gives you a ball park on ice thickness and what it can hold.  While the numbers aren't exact, they will give you an idea of what is safe and what is not.  The numbers they are using are for pristine, clear ice and not honeycombed or snow laden ice.  Remember that ice thickness and quality isn't uniform through out the entire lake and to pay attention when traveling across it.
 

Everyone please be safe this early ice; tight lines and good fishing!

Monday, November 14, 2011

Creating a Proper Fishing Report

This topic may be foreign to some people, but having and maintaining good fishing reports can be a great educational tool. It can improve you as an angler and your overall understanding of fishing.  Many anglers do not take the time to write these reports because they find it tedious and time consuming.  However, once you become accustomed to writing the reports, it only takes a short amount of time to complete.  Below is an example of a fishing report and what useful information it may contain. The reports are always adaptable and user specific so certain information may be added or omitted depending on the individual.

Location: Big Creek  2/27/2011
Time Fished: 2:00 - 5:30 pm
Water Clarity: 2 FOW
Water temp: ICE BABY!!!!! 11" of good, hard ice.  Edges perfectly fine too, skiff of snow on top of the ice
Depth fished: 23-25 FOW
Presentation: 4 MM Fiskas Wolfram (Yellow), 1/16 oz Northland Forage Minnow (Glow Rainbow), Little Atom Micro Nuggie (Glow, Glow Blue)
Species Sought: FISH!
Fish caught: 46 Gills (4 7/8"-9.25”), 6 Crappie (7.0-10.25")


Day three of my ice fishing binge took a little bit of motivation to get out the door; I can tell that it's starting the late ice season.  The weather was overcast with a slight breeze out of the north with warm temps when I arrived at Big Creek.  I decided to fish a location which doesn't get a bunch of pressure and sure enough when I arrived I didn't see any holes drilled since at least the thaw last week.  In fact there wasn't anyone fishing within 250 yards of me minus one guy who stopped by and said that he wasn't having much luck.

The fishing was phenomenal when i arrived and i attribute that to the lack of pressure on these fish as well as the cloudy water.  I had my "limit" of 8"+ gills within 40 minutes of fishing but about an hour and a half into the trip the wind started to pick up out of the north and the temps started dropping and the fish started to get tight lipped. 
 

In the report above, you can see that I always include a couple of key pieces of information in the beginning and put it in bold print.  I always follow this format to keep it consistent and easy to identify when scanning through reports.  Other helpful information might include barometric pressure readings, weather/conditions, GPS coordinates, etc.  Obviously, if you are posting these reports online you might want to keep the GPS cords to yourself! LOL!

The second part of the report just gives a short synopsis of the outing.  It may include observations, strategies, thoughts, etc.  If you fish the same lake over and over this part allows you to differentiate each outing so you can keep them straight in the future.  You can also put together some ideas in this section as a way to "connect the dots" for the next time you are out fishing and experiencing similar conditions or results based on your success (or lack thereof).  You can also include pictures, which is always nice, as it makes it easier to recall the outing.

You can create these reports on just about any program or software you like.  Some guys use Microsoft Word or Excel, I've found Blogger to actually work quite well too.  One nice feature about Blogger is the report can be either private or public; which ever you please.  If you make a template, it really speeds up the time it takes to create reports and the above mentioned programs each allow you to do that.

So, with the ice season knocking on the door, try to implement this protocol into your routine and see how much it benefits you in future trips.

Monday, November 7, 2011

New Product Spotlight: Cold Snap Reel Wraps

One of the more overlooked aspects of ice fishing setup are what is used to attach the reel to the rod.  Most guys don't give it a second thought and do what their fathers or buddies taught them to use.  Most ice fishermen attach the reel to the rod with electric tape; other anglers use self-adhesive silicone tape or other various types of tape.  There are also some ice fishing rods that come standard with a reel seat, such as the St. Croix Legend series rods, which work okay too.  However, what if I told you that there is something better; something that will blow all those other applications out of the water?  Well, there finally is...

The guys at Cold Snap, makers of such products as the Snap Cap and the Rod Clamp,  introduced a new system this fall that attaches your reel to the rod via bands.  These are not your normal, everyday rubber bands, folks.  These bands are heavy duty and were originally intended for a more sinister purpose.

The Cold Snap Reel Wrap attaches your reels to the cork handle with four heavy duty bands.  I will be the first to admit I was a little skeptical of the whole process.  Before getting the bands, I envisioned relatively loose fitting bands with a lot of "give".  Upon handling the bands I knew I was completely mistaken by my first impression of the product.  The size of each band is approximately that of a cheerio but it has enough elasticity to fit on your standard cork handle.  The handy applicator makes it a cinch to put the bands on your handle. Honestly, without it the process would be a chore.

The process is quite simple.  All you need to do is load up four of the bands on the applicator and put the large end of it on the butt of your cork handle.  Roll two of the bands off the applicator and down towards then top of the handle.  WORD OF CAUTION: DO NOT ROLL THE BANDS OFF THE FRONT OF THE CORK HANDLE.  I "might" know a guy who did this with his very first band and it took him five minutes to get the SOB back on the cork!  After those two bands are on the cork, place your reel on the handle in which ever location you please.  If you are using spring bobbers, you may want to place the reel a little further forward. If you're using spoons you may want to place the reel a little further back.  Ultimately, that decision is up to you and makes the process a breeze using these bands.  Once you have the reel seated, roll the first band onto the handle of the reel, followed by the second.  If you are not happy with the location of the reel or it moved some, just reposition the reel and do it over.  Once the top two bands are on, all that is left is taking the remaining two bands and rolling them off the applicator and onto the other side of the reel foot.  Simple as that!

So, the next question ultimately is: I have been using tape for years, why change?  In my opinion, the answer is three-fold.  The first reason is that these wraps will not damage your cork, nor leave a sticky residue like many of the adhesive tapes will.  The second reason is that the reel wraps provide easier mobility of the reels on and off the rods.  If your reel freezes up or the anti-reverse junks out, switching the reel is out very simple.  For the anglers using their ice fishing reels for double duty during the summer, it makes even more sense.  Roll the four bands off the reel foot, take the reel off, and put it on your summer rod.  Finally, and possibly the most important reason, in my opinion, is that it allows for a more direct connection between your hand and the rod blank. This allows for a better feel when fishing since there are not multiple layers of tape between you and the rod blank.

So check them out when you get a chance and see if it's something you might like and use.  Tight lines and see you all next week!

Monday, October 31, 2011

Iowa's 10,000 Lakes

One of Minnesota's famed motto is that they are the "land of 10,000 lakes".  Minnesota, along with Wisconsin, Michigan, and many of the other Northern states are blessed by thousands of deep, glacier-formed lakes.  Unfortunately for the majority of the state of Iowa, the last glacier to sweep across our land only made a small imprint in the NW portion of the state.  That glacier, the Des Moines lobe of the Wisconsin glacier, swept across our land 10,500 to 30,000 years ago.  It carved out many notable Iowa lakes such as Spirit, East and West Okoboji, Clear, Storm, and advanced as far south as Black Hawk Lake in Sac county and Little Wall Lake in Hamilton county.

Unfortunately for the rest of the state we aren't as fortunate to have these bodies of water in close proximity and are resigned to fish the many man made lakes throughout our state.  Another option for us southern Iowa fishermen are the countless farm ponds which dot the land.  The majority of ponds are within a reasonable proximity to our homes and many of the owners are receptive to allow the public to fish them.

Most of these ponds range in the size of one half acre to around five acres.  Generally they are tear drop shaped with the deepest water near the dam and the shallower water coming from the inlet water source.  Most of these ponds will max out at around twenty feet with an average depth of eight to ten feet.  Water clarity and quality is dependent on the surrounding land and the incoming water source.  Some ponds have pristine water clarity with a healthy population of submergent and emergent aquatic vegetation much of the year yet other ponds are the color of chocolate milk and lack aquatic vegetation.

Most ponds offer the chance at catching bluegill, crappie, largemouth bass, and channel catfish unless other species have been stocked.  If a consistent balance has been kept between the predator fish and the panfish, these ponds can offer the opportunity at catching trophy sized fish.  Unfortunately there is an equal chance that this balance can be broken resulting in the stunting of fish.  I could go on about selective harvest but that discussion is for another day and what im trying to emphasize is that not all ponds are created equal.

So, how does one approach these ponds and break them down?  You can start by doing your homework early in the year, during open water.  If weeds are present, see how far out the weeds extend.  Check bottom composition by checking your anchor when you pull it up.  Is it clean, does it have silt on it, does it have "muck", etc.  Sample the fish in the pond; what species are present, what size range do you consistently catch, are you finding them in a certain location, etc?  Ask the owner if he or she fishes the pond or has spoken with those who have fished it.  What are they catching, have they put any structure in the lake, do certain approaches work better then others, etc?  I'm always reserved when I ask about what size of fish they have been catching.  Most fishermen embellish their catches and I can't begin to tell you how many times I've heard of eight pound bass and pound bluegills being caught when that simply isn't the case.  You're better off asking for lengths as it is a more accurate way to gauge the size of fish.

(10" Farm Pond Bluegill)
For bluegills, my approach is pretty simple.  If the lake has good weed growth I will start in the bays which have those weeds and are in close proximity to deeper water.  Generally the depths are going to range from three to six feet of water.  If the weeds are brown and down or it is mid-season and the oxygen levels are low in the shallows I will move out to the base of the first break.  This is the "sticky bottom" area that Dave Genz talks about in depth and is a prime location to check.

Below is a short video I made while fishing a local farm pond.  Notice how the fish are utilizing the base of the break, ie: sticky bottom area, and meander up and down it all day.


Time of day and weather are also determining factors of fish location.  If it is the middle of the day on a blue bird, sunny day I'm bypassing the bays and going straight to the base of the first drop.  This depth can vary depending on the location in the pond, but will generally be in about 14-18 feet of water assuming the max depth is around twenty feet.  If this location is unproductive, I'm going to start drilling further out into the basin in zig-zag fashion until I contact fish. 

(15" Farm Pond Black Crappie)
For crappies, my approach is slightly different then that of bluegills.  If I'm targeting crappies exclusively, I'm going to start my holes out in the middle of the pond and start zig-zagging them back towards that first break.  Crappies are more inclined to be higher in the water column than bluegills so I will start my approach higher up in the water column and work my way down towards the bottom.  Again, time of day and weather play a role.  If it is a bright, sun shiny day then the crappies will probably be more in the bottom third of the water column as compared to an overcast or low light situation where the crappies will generally be in the bottom half of the water column.

(Pallet Tee Pee Structure)
Another key component of these ponds is the structure present in them.  Structure provides cover for the panfish and it also provides a food source since many aquatic insects and plankton will be around and on it.  The best structure is that which is located near deeper water as it will offer cover all winter long for the fish to utilize.

I've found the part of lake near the inlet to be mostly unproductive during the winter.  In many ponds there isn't as much weed growth here since this part of the pond silts in first and is pretty shallow.  Not to say that the fish won't use this area from time to time, just that it doesn't concentrate the fish as well.  You could make the same argument for the shallow bays which don't have weed growth too.  I've seen panfish in those shallow bays while fishing, especially at changing light periods, but not near the same concentration as the sticky bottom and basin areas.

The nice thing about these smaller bodies of water is that the fish can only be in certain areas so you can cut these lakes up pretty quick and find the fish.  On a one acre pond, cutting thirty to forty holes should result in being able to set up some form of pattern of what the fish are doing. If you are willing to hole hop around and find where the active fish are located you may be pleasantly surprised by what lies underneath the ice.

Hopefully some of these suggestions will help you in the future and don't be afraid to knock on a few doors, you never know which pond might be your next honey hole!

Monday, October 24, 2011

Advanced Tip-Ups for Dummies

For many pan fish anglers in particular, the concept of tip-ups is quite foreign and not well understood nor embraced.  I will certainly agree that with most fast paced ice fishing tactics, tip-ups really don't follow in that same mind set and actually slow down your ability to cover a lot of water in a small amount of time.  Furthermore, here in central Iowa we are not afforded the luxury of having great walleye, northern pike, or lake trout fisheries; all of which are perfect candidates for using tip-ups.  What predator species we do have in most of our area lakes are large mouth bass and channel catfish and both species can be readily caught with tip-ups.

In Iowa the regulations state that we are only allowed two lines per person while fishing all inland waters, but on the Mississippi and Missouri Rivers and their backwaters each angler is allowed to use up to three tip-ups per person.  Other states have a more lenient stance on numbers of lines, for instance South Dakota, which allows each angler to use up to four tip-ups when ice fishing.

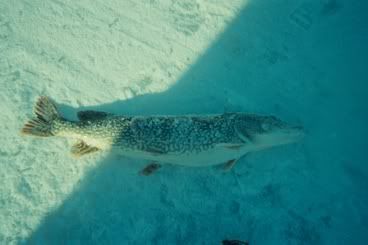
(33" x 16" Northern Pike caught on tip up)
So if tip-ups don't let you cover a lot of ground quickly, are somewhat cumbersome, and you can only use one or two on all inland waters here in Iowa; what's the point?  To put it simply, tip-ups can and do produce large fish!  In my own experience, some of my largest fish I've iced have come off of tip-ups.  The topic im going to cover in this piece is more along the lines of improvements and suggestions beyond "typical" tip-up set ups and presentation.

Im going to start by going over a couple of tip-ups i use and have good success with.  The first one i will talk about is the HT Windlass Tip-Up.  The unique thing about this tip-up is that it has a vane which catches the wind and in part gives the live bait more motion under the ice.  It has two springs which adjust the tension so these tip ups can be fished in strong winds or light breezes and it allows for larger bait to be used as well.  The only caveat i have is that this tip up is really only effective down to about 15 degrees Fahrenheit.  Any colder and it becomes tedious removing the ice which accumulates on your line and marker.  One suggestion if you're going to use this tip-up when the temperature is in the teens is to use an ice hole insulator like the one i have linked.  It does a really nice job of keeping that hole open longer.

The one modification i made to this tip-up is to put reflective tape on the orange flag.  This allows me to view my tip-ups at night and from a long distance.  Many of the next tip-ups i will discuss have lights you can add onto them but with this style of tip-up, it isnt as easy.  Also, the lights run off of batteries and we all know how well batteries and the cold mix.

The next tip-up i will discuss is the Frabill Thermal Tip-Up.  The nice thing about this tip-up is that it has some Styrofoam insulation incorporated into the product.  By having this insulation, it does a great job of keeping the hole open in very cold weather.  When the temperature drops below 15 degrees, this is the tip-up i pull out.

The modification i made on this tip-up is the same as on the HT Windlass.  I took reflective tape and put it on one side of the tip up flag so when viewing at night or from further distances, it is easier to see if the flag is up or down.  Do make sure to only put it on one side of the flag and not both since the white reflective tape is a lot harder to view during daylight.

This style of tip-up also has a handy storage container where you can put extra hooks, beads, lights, split shot, line markers, etc.  Also with these tip-ups, you can add a light which trips when it is turned upright and starts blinking.  Again, it is a very nice accessory and i certainly use it but batteries and cold weather don't always play well with each other and it's nice to have a back up.

So i've covered what's above the ice, now i will finish by discussing what's below the ice.  When fishing for bass or catfish i prefer to use a leader of fluorocarbon line as compared to a steel leader you might use when fishing for northern pike. Eight to ten pound test line is all that you really need unless you are targeting much larger catfish.

Similar to open water fishermen who pull Lindy rigs or bottom bounce spinners, i like to dress up my presentation.  This especially holds true in either dirty water or when fishing at night.  The sky is truly the limit on what you can add for "bling" but some of my mainstays have always been soft number three to five glow beads and the same size hard bead in brilliant colors.  You can experiment with color patterns and combinations but i always make sure i have a few options available.

One thing i started experimenting with a few years ago was the addition of sound to my live bait offering.  We all know that fish are visually interested in colors and we have that covered with the beads, but we also want to excite their lateral line receptors and i have just the ticket.

Bass guys have been using it for years but not a lot of ice fisherman utilize glass rattles in their presentation.  One easy solution is to take a glass rattle, cut a piece of shrink tube so it covers the rattle and slide it on your fishing line.  Take a lighter, be very careful not to touch your line with the flame, and heat the tubing so it adheres to the glass rattle and your fishing line.  You can slide the rattle anywhere on the line and it stays put.  I have fished this setup with great success on large mouth bass as well as walleye.

So that pretty much wraps up some simple suggestions i have for running tip-ups this winter.  For those guys who like to fish with a minnow and a bobber, the addition of glow beads and glass rattles certainly work for your style of fishing as well.  The next time you're out fishing, try one rod with your normal presentation and the other with some of the modifications i mentioned and see which one does the best.  Try it a few more times you are out and see if a pattern starts to develop; you might be surprised!
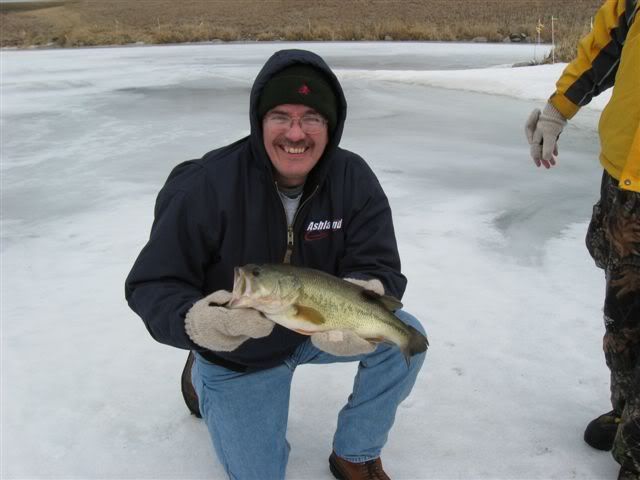
(18"x13" Largemouth Bass caught on a tip-up)

Sunday, October 23, 2011

Sunday Edition: F+W Media 2012 Ice Guide

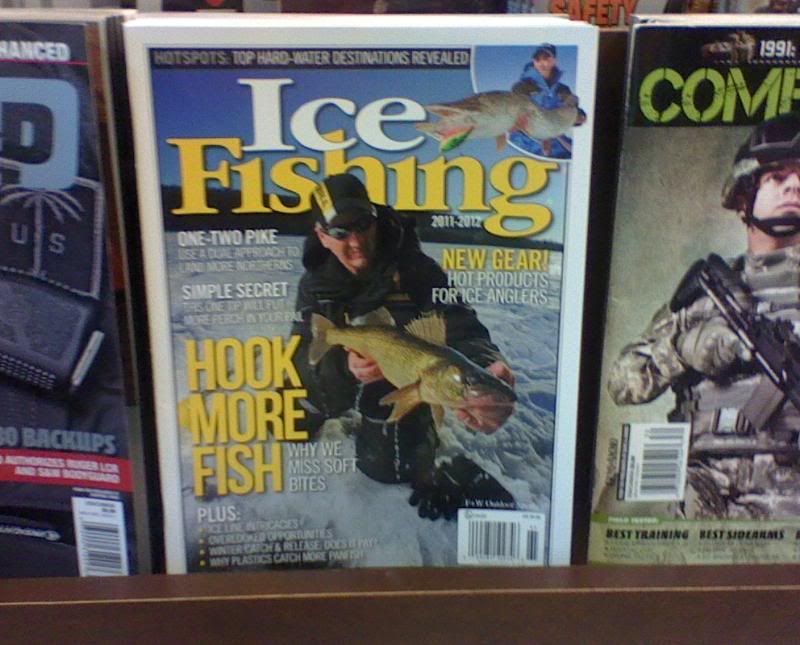
Most ice fishing guys enjoy reading the In-Fisherman Ice Guide which comes out each October and i agree that i enjoy reading it as well.  A little bit lesser known publication is made by F+W Media and is also released during October.  I've found in the past that the F+W magazine offers a little bit more "meat and potatoes" in terms of ice fishing articles.  In any case both are fun to read and help get you amped up for the up coming season.  

I was able to find the F+W Ice Guide at my local Barnes & Noble bookstore but i have heard of others finding it at their local grocery stores as well.  Both are worth the five to six dollar price tag!

Monday, October 17, 2011

New Product Spotlight: Ice Troller Auger Carrier

Ice fishing has certainly transformed in the last thirty years and one would be suffice to say that it has really evolved in the last five to ten.  With advancements in modern electronics, clothing, tackle, and various other fishing gear we are able to fish longer, more comfortably, and cover more water then ever before.

One such advancement would be the advent of using transportation while on the ice.  For many anglers, especially those in the southern fringe of the ice belt, that mode of transportation is either an ATV, UTV, or snowmobile since the ice isn't always safe enough for truck or car traffic.  For some anglers, those aforementioned vehicles have almost become like bass boats due to all of the gear they store.  But let's not get ahead of ourselves, as that will be a topic for another day!

In this entry i will be discussing the Ice Troller Auger Carrier which is made by Digger Anchor of Sauk Centre, MN.  This is the same company which has brought you the Freshwater Digger Anchor, the Digger Ice Angel, and various other fishing related gear.

The problem with designing an auger rack is that you have many companies making augers these days and each company will generally make numerous models as part of their product line.  Not every auger's engine, gear case, and flighting are in the same location so designing a rack can be a nightmare.  The boys at Digger Anchor were able to design an auger carrier which will work with most of the major auger manufacturers and can be mounted to an atv and a snowmobile.

I was first introduced to this auger mount while i was up at StrikeMaster a few weeks ago picking up my new Strike Lite II four stroke auger.  I was impressed with the construction of the auger mount and it's ease of use.  The auger mount is made of powder coated aluminum so it has a real nice, durable finish and is very light weight.  New for this year is each location where the auger contacts the mount is now plastic instead of metal so it won't be as inclined to damage your auger.  If you're concerned about the durability of the auger carrier, sleep easy because they come with a lifetime warranty.

The auger is secured to the rack via a clamp which you can see in the photo above.  The nice thing about this feature is that all you need to go from driving to cutting holes is releasing the clamp, taking off the blade cover, and pulling the starter rope; it's that simple!

For the guys who run four stroke augers, you know that the position of the power head is very important.  If the auger is in the wrong position, some of the oil will leak out and cause you a lot of problems with the auger.  Digger Anchor is putting a bungee cord in each box which can be used to secure the auger in the correct position.  That option does work if you have your rack on a flat surface.  Unfortunately, the front rack on my Arctic Cat ATV is slanted slightly downward which made the power head of the auger spin despite the bungee cord holding it.

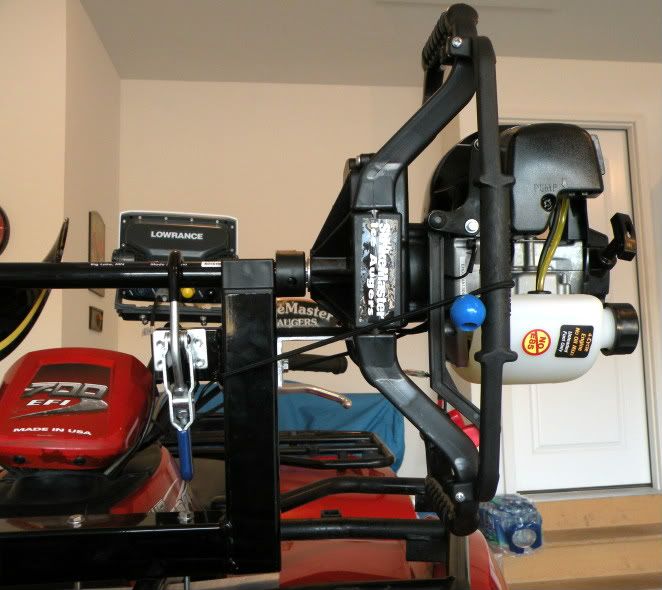
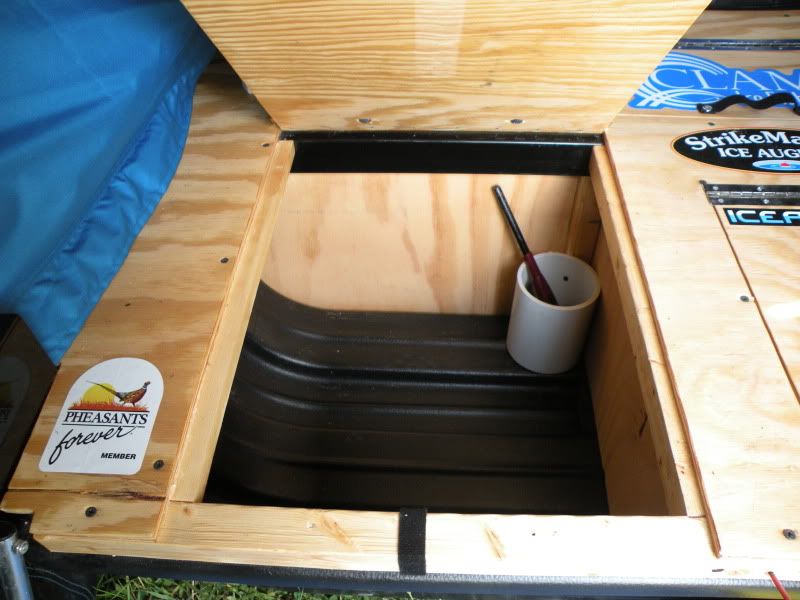
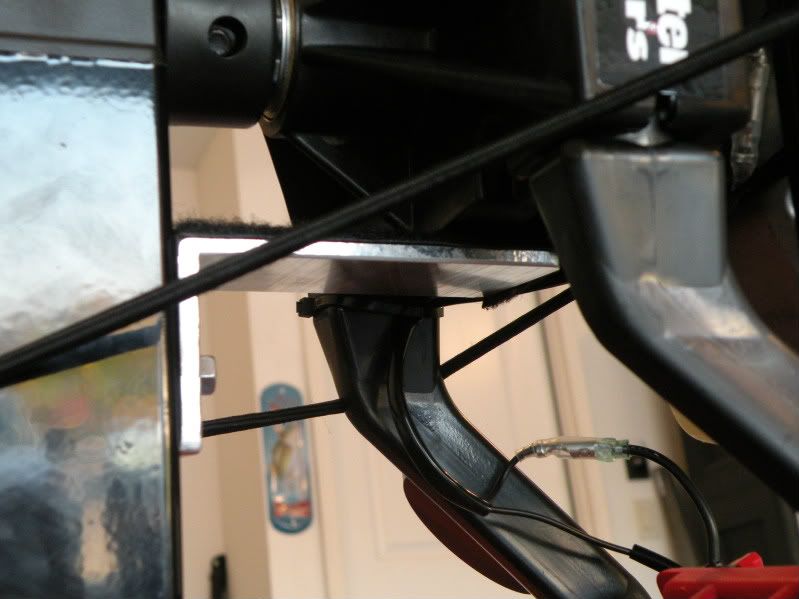
To resolve this problem Digger anchor is supplying an aluminum L bracket for the auger mount if you request it.  What this bracket does is support the weight of the gear case and power head and it stops the spinning of the auger while in transit.  It made a huge improvement once i installed this bracket and corrected the spinning issue.  I test the mount out while going over some rough terrain and small jumps and it held up flawlessly.  Digger also included some self adhesive Velcro patches which i attached to the top of the L bracket to keep it from marring the gear case.

For the Polaris owners out there, they haven't forgotten about you either.  Digger Anchor has made a bracket for your stock composite rack called the Wrench-N-Ride expansion plug system.  This system replaces the Polaris Loc-N-Ride system and allows you to attach the auger carrier to your composite rack.

While the design isn't completely perfect yet, it is dang near!  What i would like to see in the future is a cradle for the power head which would further support the weight of the power head and gear case and also completely remove the potential of the auger spinning.  I don't think it would be that difficult to design and I'm sure that someone will come up with that design eventually.  Until then, i see this as one of the better auger rack options out there for a four stroke auger and i look forward to testing it more this winter.  I will be certain to give a report once i get some "miles" on this rack and see how it has held up.
(Completed Project)

Monday, October 10, 2011

2011 Thorne Brothers Portable Shack Modification Event


(Notice the RAM mounts for electronics)
In this installment, i will discuss some of the portable shack modifications which were at the TB event.  There were a lot of really good ideas and designs that day.  Some might not be feasible for certain fishing styles, but like anything you can take bits and pieces and make them a part of your own fishing style.


First off i have Thorne Brothers Pro Staffer Matt Johnson's shack.  It is a Jason Mitchell Pro Thermal 1 Man ice house with some nice modifications to it.  These shacks are new to the market this year and offer some really nice additions like led lights, a bait well, an included battery bracket, a full thermal shelter, among other options.  Matt added some RAM mounts to his shack which allow him to rotate and pivot his electronics in his shack.


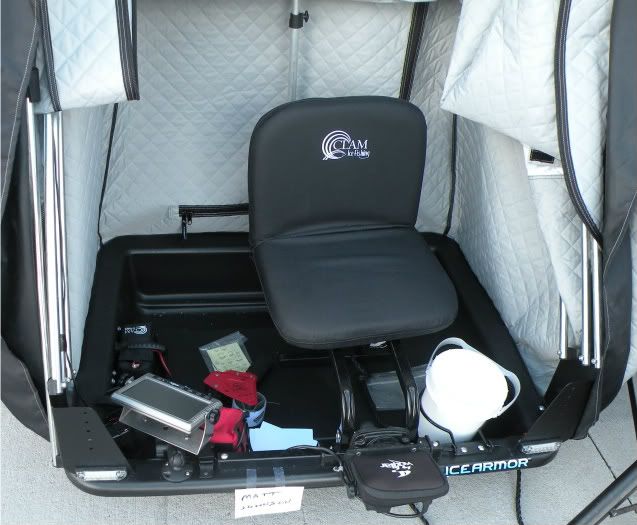
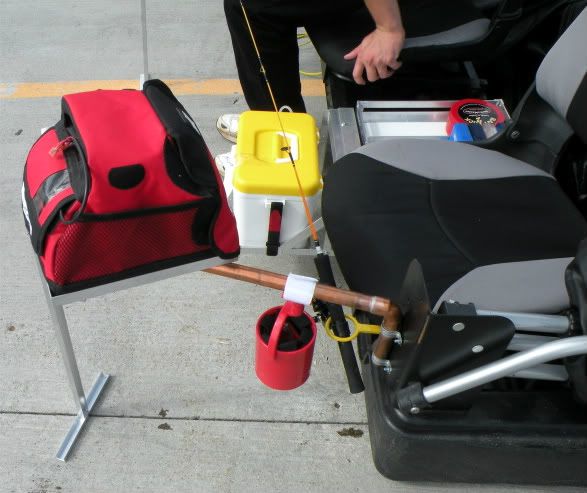
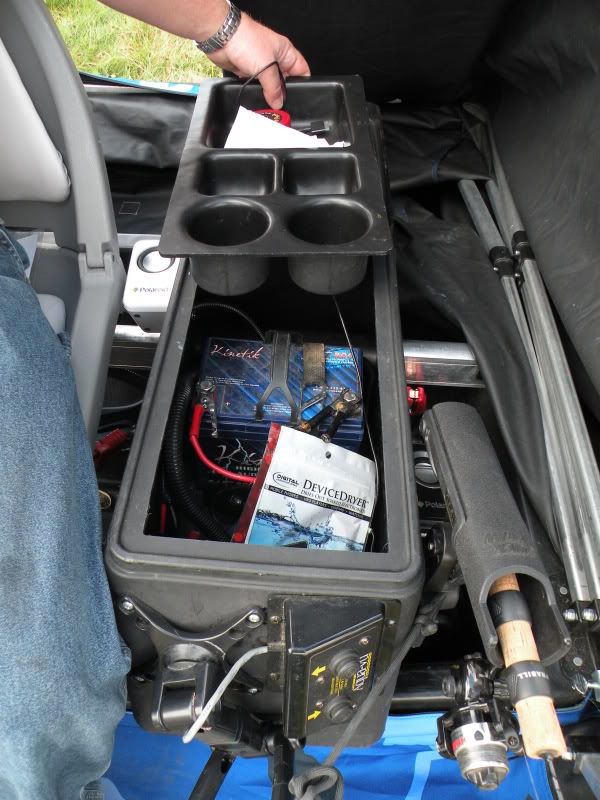
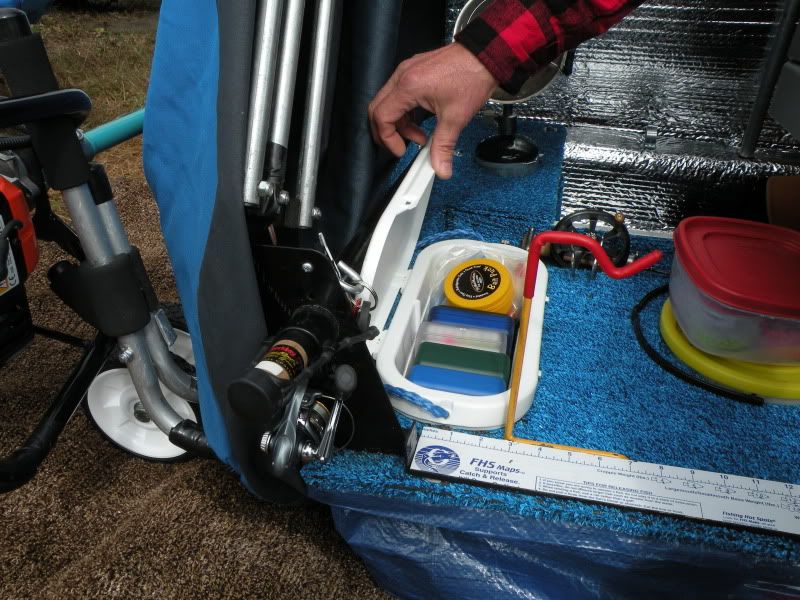
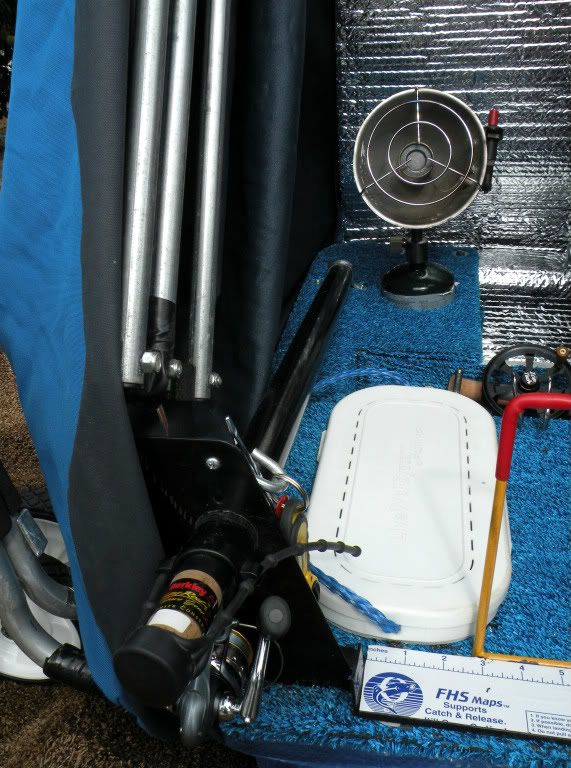
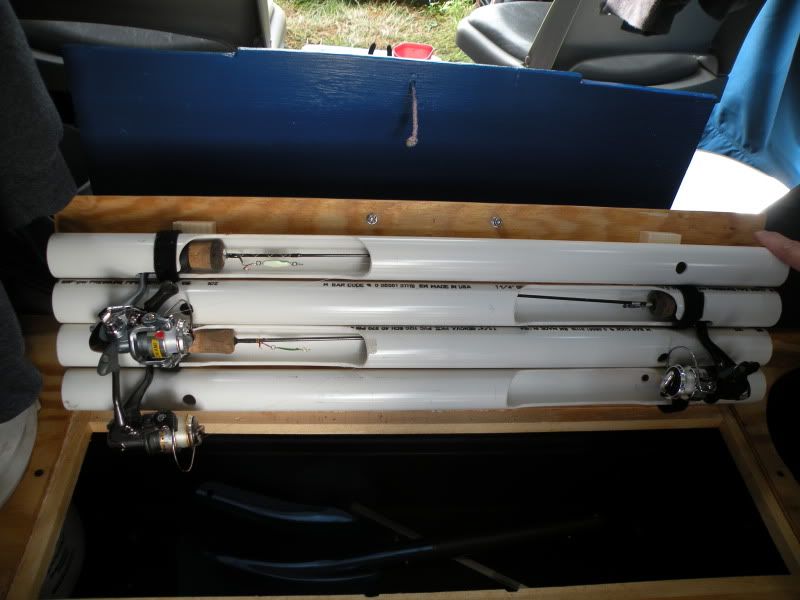
The second shack is Juan Arellano's Fish Trap Pro TC one man ice house.  Juan placed some LED touch lights along with some rod storage in his one man shack.  Simplicity and organization are keys to having a good lay out of one's shack and Juan did a very nice job of accomplishing that.

The next modification i will touch on is that of "Mr Ice Fishing" himself Dave Genz.  It was a treat to have Dave at the gathering and being able to converse one-on-one with Dave about ice fishing for fifteen minutes was outstanding.  The experiences and stories Dave shares are always a joy to listen to and you can certainly gain a lot of information if you pay attention.

To the right is a picture of Dave's van that he uses when he goes ice fishing.  If you notice, they have added a tiered system which allows them to neatly store and haul four to five individual ice houses in the back of the van.  Everything is neatly stored and out of the elements while in transit from one location to the next.


The picture to the right is the seat of Dave's Fish Trap Trapper one man ice house.  Dave modified the seat by adding a plywood backrest which houses his Clam battery bracket.  He also attached a long aluminum pole to the chair which he then RAM mounted his Vexilar flasher to.  By doing so, he could pick up his chair and flasher with one hand and carry his fishing rod in the other hand.  Also by having the flasher spaced out in front of him, it gives him a little bit better line of sight when he is jigging.

The event didn't just feature ice houses, there were many other portable fishing set ups as well.  Included below are a few examples.  In the first example you will see a StrikeMaster Glide Lite sled with some modifications.  The gentleman added a rod holder system which allowed him to carry his fly reels which were too large to fit into the standard holes of the sled.  He also added pro mount attachments for his flasher, underwater camera, and other electronics.  The nice thing about pro mounts is the ease of moving your equipment.

(Close up of the Pro Mount)

To the left is an adaptation of the Sonic Ice Hopper fishing system.  While it wasn't as "clean" as the Sonic Ice Hopper system, you could build it for a fraction of the cost.  The premise of this portable system is the ability to carry your flasher and/or camera and bucket in one hand and fishing rod in the other.  This allows the user to hole hop more efficiently.  The battery is located in the seat and you can see the power cable coming out of the right hand side.

I've included the remainder of the pictures i took below.  There were some really creative ideas and i highlighted some of the modifications of each.
(Elevated, pivotal flasher mount made of aluminum and copper)


(Aqua Vu MAV camera)


(Controls for Aqua Vu MAV, battery, bluetooth reciever, speakers, etc)


(Marine carpet, reflectix, rod holder, auger carrier, heater mount, rod and tackle storage)
(Close up of rod, tackle, and heater storage)

(Close up of rod holder and tackle storage)
(Close up of plywood decking and storage compartment
(Rod Storage)